The Riz Team Blog

Archive for the ‘Enhance Your Home’ Category

Back to school organizing tips

Friday, September 6th, 2013

Get your kids and your home ready for the hectic back to school season with these easy organizing tips.

By Kelly Potter ¦ Style at Home Magazine

As the summer comes to an end, the fall brings a season filled with packed lunches, rushed mornings and a house in disarray. It’s that time of year again, when the kids head back to school.

Wendy Hollick is a proud recipient of the 2011 Professional Organizers in Canada Ambassador Award and owner of Neat Spaces where she offers clients professional organizing help. Wendy is also a mom of three kids, so she knows a thing or two about the back to school rush!

Keeping the house organized once the kids are back in school can be difficult. According to Wendy, keeping things simple, getting the kids involved and organizing one room at time are helpful approaches to organizing during the back to school months. “Rooms that need the most attention are the bedrooms, bathrooms, homework area and the kitchen,” says Wendy. Here are some practical back to school organizing tips for each of these rooms:

Back to school organizing tips

Kids’ bedrooms

Wendy says the bedroom is a place of rest and that toys should be limited here. “Getting the kids involved and giving them the tools to become responsible is essential to keeping their rooms organized, “ she says. Large hooks on the back of the bedroom doors are a great idea for the kids to easily throw their hoodies, baseball caps, etc. Having shelves is another simple way for the kids to store their belongings. Wendy suggests big open shelves so that they can put their books, trophies and pictures on display, while staying organized. “Once the stuff is off the floor, it’s not clutter,” she says.

According to Wendy, clothing tends to be the biggest issue in the kids’ bedrooms once they go back to school. She suggests purchasing an affordable clothing organizer or getting a customized one put in. Keeping the clothes off the floor by having ample hanging space is essential. It’s also important to keep the hangers all one colour to bring a sense of simplicity and organization to the room, she says.

Bathrooms

If more than one child needs to use the bathroom in the morning, things can be hectic. Wendy suggests making a schedule for the kids to have their showers/baths to avoid fighting over time in the bathroom. “Older children prefer to have their showers in the morning, so the younger children can be scheduled before bedtime,” Wendy says. “Schedule a time that makes sense.” Assigning a specific colour of towel to each child will also eliminate bickering over whose towel is whose and reduce laundry loads.

In order to have clutter-free counters, Wendy suggests installing pullout drawers in the cabinets for an easy storage idea and to help the kids see what is in the back of the cabinets. According to Wendy, using the wall space is essential. She says using small decorative shelves and wall organizers for towels, shampoo, soap, etc. will provide extra space. Hooks on the back of the bathroom doors are a great solution for hanging towels and housecoats.

Wendy says that Mom should get the kids involved in organizing the bathroom by assigning the children plastic caddies for their personal items. They can bring their stuff back to their rooms and back again when needed. Having small, colour-coded bins for their stuff in the bathroom also helps each child be responsible for their own items and keeps the counters clear.

Homework area

Setting up a homework area will help the kids  stay organized and keep school papers confined to one area. Wendy  suggests setting up a small area in the kitchen. “Kids tend to  gravitate towards the kitchen after school, so setting up an area for  them to do their homework there is ideal. They don’t need fancy, they  just need practical,” she says. Having everything they need at their  workstation, such as pens, pencils, magazine files and calculators will  eliminate wandering and help them focus.

Kitchen

According to Wendy, organizing the kitchen  means removing anything that doesn’t belong there. You must remove  anything that doesn’t serve a purpose in the kitchen (e.g. paperwork,  exercise equipment). To keep the counters clear in the kitchen, Wendy  suggests using decorative bins and baskets. “If things are  ‘containerized’, they tend to stay organized,” says Wendy. Labeling the  bins is also helpful. If something is labeled, the kids are less likely  to stash the item somewhere else when they go to put something away,  says Wendy.

Wendy suggests making the kids’ lunches the night  before. “You don’t want to stress yourself out in the morning,” she  says. Having plastic Tupperware that is colour coded for each child will  help the kids know whose lunch is whose in the morning. Colour coding  each Tupperware that contains a different type of food item also helps  Mom know who ate what, and what to look for if the container goes  missing, says Wendy.

Donation bins, garbage and recycling bins  for easy disposal are also helpful for organizing the kitchen (and other  rooms), says Wendy. Separate bins make it an easy and efficient way to  sort items that you are getting rid of.
In order to maintain an  organized home during the back to school months, Wendy suggests taking  15 minutes to clean and organize at the end of each day. “Go into any  room and picture what the space looks like when it’s organized, and then  work clockwise and remove anything that does not belong within the  vision of that space,” she says.

{Source}


Budget Fixes for Drafty Windows

Wednesday, January 9th, 2013

Keeping your home warm doesn’t come at a high price, thanks to these easy-to-do fixes. Bring on the Heat!

Elsa Satella • This Old House magazine

On average, 10 to 25 percent of a home’s heat escapes through its windows. If you’re feeling drafts, you should consider reglazing or even replacing your windows. But if you can’t because of time—or budget—first weatherstrip, then try these other temporary fixes to help beat the chill.

Plastic Film

Applied to panes with double-sided tape and sealed using the heat from a hair dryer, this inexpensive clear shrink film can allow a room to retain as much as 55 percent of its heat. In a pinch, bubble wrap makes an effective replacement; just push the bubble side of the wrap against the glass and adhere with double-sided tape.

Shown: Duck Crystal Clear Shrink Film, about $13 for two 3-packs, My Brands.

Draft Snakes

Stop cold air from creeping through windowsills with a snake. You can buy one online, or easily make one yourself by filling a tube of fabric, like an old knee sock, with dry rice.

Shown: Window and door draft stopper, about $10, Improvements

Rigid Foam

For basement and attic windows you don’t need to see out of, cover the panes with a piece of foam board glued to ⅜-inch drywall. Cut pieces to fit snugly inside the frame, press the foam side against the glass, then simply pop out when you want to let in sunlight.

Shown: Dow ½-inch polyisocyanurate rigid foam sheathing, about $12.50 per 8-4-foot panel, Lowe’s

{Source}


Holiday Decorating on a Budget

Thursday, November 29th, 2012

With a spark of imagination, holiday decorating can be inspired yet inexpensive

By Trish Sinclair, Style at Home Magazine

Whether you’re planning the Christmas party of the century, or burning the Yule log on your own, holiday decorating does not have to break the bank-or your festive spirit.
Your creativity can take you far. Try these tips and projects to make your home a holiday haven, while only spending a Dickens’ halfpenny.

1 Christmas close-outs

Check local newspapers often for special ‘close-out’ sales. Often lasting only two or three days, close-out sales are gold mines for everything from kitschy candles to bushels of tree lights, at prices lower than wholesale.

2 Festive foraging

Gather nature’s ornaments, such as pinecones, acorns and balsam fir tips from the backyard or local park. Add a touch of silver or gold spray paint to your gatherings and arrange in a glass bowl surrounded by votive candles.

3 Christmas aromatherapy

Delight houseguests with the warm scent of a mulling spice bag. Combine whole cloves, allspice, cinnamon sticks, and nutmeg with dried orange and lemon peel in a small piece of cheesecloth secured with elastic. Simmer the spice bag in a pot filled with 3-4 cups of water, and enjoy the aroma.

4 Merry memories

Gather a collection of favourite family and childhood Christmas amaryllis plant is a holiday favourite, and should be potted six weeks before Christmas to yield large, stunning blooms. Pot two or three of the festive ‘Peppermint Stick’ variety, which are white, swirled with red.

6 Christmas by candlelight

Nothing creates a festive ambiance like the glow of candles. For a dining or coffee table centrepiece, group three pillar candles of various heights in holiday colours on a ceramic or other non-flammable dish. Scatter several tea lights in small glass holders along a mantel, bookshelf or buffet table.

7 Charlie Brown-style

At half the price of big trees, one to three-foot high mini evergreen trees make adorable desktop or table decorations. Perfect for apartments and other small spaces, ‘Charlie Brown’ mini trees are available at many garden centres and Christmas tree lots.

8 How fairy festive!

Add a twinkly, romantic effect with white fairy lights. String lights along the length of a window curtain rod to brighten a room. Arrange a strand of lights along a mantelpiece, weaving lights among Christmas cards and ornaments.

9 Deck the halls and doors …

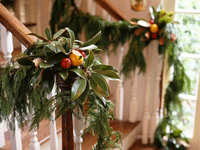
Fallen evergreen boughs and small pieces of greenery can be collected outdoors or purchased cheaply in surplus from Christmas tree lots. Natural boughs add a traditional Christmas look and scent and they can adorn banisters, doors and mantels.

10 Fragrant fireplace

Dress up a bare hearth by decorating a small wood log with flammable, decorative, scented accents, including sheet moss, pinecones, cinnamon sticks and whole cloves. When burned, this Yule log will make a glowing fire with a festive fragrance. (Use non-toxic white glue to decorate log rather than hot glue.) See below for instructions.

Scented Yule log With this decorative, burnable Yule log, the open hearth or top of a woodstove will always look and smell festive:

Supplies: • 1 sheet moss (from florist or craft store) • small wood log • white craft glue • pine cones • cinnamon sticks • whole cloves • pot pourri (Christmas blend) • essential oils (pine, cinnamon, balsam frankincense)

Instructions: Glue the moss to the top of the log. Glue potpourri pine cones, cinnamon sticks, whole cloves, cinnamon sticks onto the moss. Sprinkle a few drops of essential oils to the moss and spices. Add a festive bow to the top of the log (to be removed before burning).

{Source}


50 Cheap and Chic Kitchen Perk-ups

Friday, October 26th, 2012

Organizing, styling and mini-makeover ideas to transform the hub of your home


By: Margot Austin  Style at Home Magazine

1 Elevate the everyday – invest in a set of handmade cereal bowls.

2 Granny Smith apples – a stylist’s secret weapon – are a pretty countertop accent and a healthy snack all in one.

3 When was the last time your toaster made toast the way you like it? If you can’t remember, it’s time for a new one.

4 Use a bench with storage as a kitchen banquette.

5 Treat yourself to a fresh set of dishtowels. Reuse the old ones as rags to polish silver, shine shoes or wipe up paint spills.

6 Display a vintage dishware collection on open shelves.

7 Hot-glue a seldom used vintage kitchen utensil in a shadow box and start a collection to adorn your walls.

8 Overhaul the area under your sink cabinet to make room for garbage, recycling and composting.

9 Bake a pie or layer cake – your kitchen will be transformed in less than an hour.

10 Hide the counter clutter of keys, cellphones and sunglasses inside a Moroccan tajine.

11 Remove everything from the tops of cabinets. Thoroughly clean the area. Do not replace the items!

12 Get rid of any chipped plates or cups – they’re getting you down.

13 Dress the windowsill with two or three pots of moss or herbs.

14 If you have glass door cabinets but can’t keep what’s inside looking tidy, line the glass panels with wallpaper or fabric, or apply frosted window film.

15 Install energy-efficient under cabinet lighting.

16 Use crystal flutes for your orange juice tomorrow morning. Champagne optional!

17
Create a photo wall of family members with their birthday cakes over the years.

18 Conceal scratches or dents on an old fridge with decorative wall decals.

19
A rough-hewn wooden bowl looks just as great empty as it does filled with rustic breads, artichokes or newspapers.

20 If there isn’t a window above your sink, hang a mirror there.

21 Add French flair: opt for a rustic table and chairs in the centre of your kitchen rather than an island.

22 Wallpaper the ceiling.

23 Tall ceilings? Install a large nontypical central light, like a chandelier, lantern or industrial pendant.

24 Cook up some natural air freshener: In a medium saucepan, bring 2 cups of apple cider to a simmer. Add a few slices of lemon, cinnamon sticks and 1 tsp whole cloves. Simmer for a couple of hours, adding more cider as it evaporates.

25 Hang a fabric blind with an elegant swag for a touch of grandeur.

26 A potted orchid in a white ceramic pot is a sophisticated living accessory that lasts longer than cut stems.

27 Install a new faucet.

28
Use a shallow baking dish to store cooking essentials by the cooktop or stove. It will keep everything exactly where you need it and save your counter from oil rings and pepper grinder debris. Decant olive oil into an opaque or dark glass bottle to protect it from light.

29 Treat yourself to a new set of canisters.

30 Say no to paper napkins and switch to a colourful fabric set.

31 Switch out your dated kitchen chairs for black Windsor chairs. They’re a design classic – great with mod or trad tables.

32 Remove a pair of cupboard doors and style the open shelves with your prettiest things.

33 Install invisible touch-latch hardware for a sleek, modern look.

34 Hang wallpaper as a backsplash. Protect it with acrylic or glass panels custom cut and installed by a glazier.

35 Leave only your chicest small appliances on the counter.

36 Conceal an ugly backsplash behind peel-andstick Smart Tiles.

37 Banish old knobs in favour of sexy new ones.

38 Conquer the junk drawer.

39 Get a handsome mortar and pestle. When you aren’t using it to muddle mint for a mojito, press it into service as a bookend for cookbooks.

40 Paint your cabinets nature’s neutral – green. It will look great with all your fruits and veg.

41 Display a pineapple when you’re expecting guests – it’s the universal symbol of welcome.

42 Make a pretty message board by placing fabric or decorative paper behind the glass of a large frame. Then use a dry erase marker to write on the front.

43 Add shaped brackets along the toe kick to make your cabinets look like fine furniture.

44 Install decorative casing trim around your pass-through.

45 Banish the smelly dishcloth hanging over the faucet! Organize your sinkside essentials on a rectangular dish or tray. The must-haves: dish soap in a pretty container (or decant some into a translucent white squeeze bottle), an all-natural cellulose sponge for dishwashing, a scrub brush and a plastic scrubber for pots.

46 Install a plate rack. Use it to display a collection of platters or cookbooks.

47 Splurge on a marble-top dining table for your best friend.

48 Keep utensils contained and at the ready in a plain white pitcher – it goes with any kitchen.

49
Perk up a family table with cheerful oilcloth that you can wipe clean in a flash.

50 The next time you buy groceries, bring home a bunch of daisies for the kitchen table.

{Source}

How to: Stage your home

Tuesday, October 23rd, 2012

Woo potential buyers with these DIY tips for the perfectly staged home.


There’s no escaping the raw power of first impressions, especially when it comes to selling your home. Each time a potential buyer walks through your front door, you want their immediate thought to be: WOW!


The key to creating the right impression is being able to envisage what potential buyers will look for in your home.  Can they see themselves living there and spending time with friends and family? Is this a space they’d love to entertain in?

Home staging is essential in helping you bring their vision to life and can make a big impact on the selling price and timeframe. Ideally, you’ll want to focus on the entire house, but depending on time and budget, your main selling rooms take priority.

Your front entrance is the introduction area buyers will see. This is where they’ll base their first impression and determine how the rest of the house is going to show. The living room is usually one of the first rooms buyers see as they go through the house. This room will determine the general style of the home whether contemporary or traditional or somewhere in between. The dining room is where buyers will enjoy meals and celebrate holidays and special occasions. The kitchen is where people spend most of their time, and when entertaining friends and family, that’s where everyone tends to gather. The family room or great room is the second area where people spend most of their time relaxing and entertaining. The master bedroom and en-suite is a special sanctuary for buyers. They want to be able to go into this room, close the door and forget about everything else. It needs to feel like the perfect escape from their hectic and busy lifestyle.

The key is to look at each room and determine how you would feel if you were a buyer standing in the doorway looking in. How does your flooring look? Buyers want to purchase a home that is move-in ready and flooring is one of the top selling features  a buyer  is looking for, so invest in your equity and replace any worn or outdated flooring.  What colour are the walls? If your house is painted in very bright or unusual colours, potential buyers may be turned off or at least feel that this is a starting point for them to negotiate on price since they will have to paint as soon as they move in. By going neutral with your colours and adding colour and texture with accessories like pillows and throws, potential buyers will be able to emotionally connect with the home and visualize living there. Does the position of your furniture show off the size of the room? Does the room feel cluttered? Does the furniture in the room tell the buyer how this room can be used? How much lighting is in each room? Properly placed furniture and lighting will show off the prime features and allow buyers to see how each room functions.

1 Clean your windows inside and out. When buyers are touring your home they want to see the view from each room. If the windows are dirty, it may make them question how well your house has been maintained.

2 Use frosting spray or interior design film on windows that don’t have the best view. This will block a not-so-attractive view, but still allow light to come in.  And it’s cheaper than buying blinds. If you already have blinds, turn the slates up so that light can still come through but the view is muted.

3 Clean out your closets.
  Buyers always check closets so pack away any off-season items and anything you don’t use on a regular basis. Try to remove as much off the floor as possible; this creates the feeling that the room is more spacious.

4 Create a spa-like feeling in all of your bathrooms.
Use white or off-white towels and add a fabric shower curtain. Place greenery on counters or the tub area to create the feeling of warmth and relaxation.

It’s important that you depersonalize and emotionally disconnect from your house. By doing this, you will allow yourself to transform your home into what your potential buyers are looking for. And remember, taking the time to properly prepare your home for sale will help sell it quickly and for top dollar.

Carla Woolnough is the creator and host of the How to Stage your Own Home DVD series. She’s also the founder of the home decorating and staging company Nex-Step Design and the national spokesperson for “Are you Fit to Sell” program.

The $967 Kitchen Remodel

Thursday, October 18th, 2012

Warm brown paint, glass mosaic tile, and fresh fixtures update a drab old kitchen

Natalie Rodriguez   This Old House Magazine

Looks Like a Million Bucks


With kitchens, simple does not necessarily equal streamlined. For homeowners Eduardo Perez and Moo Sirikittisup, the kitchen that came with their Atlanta condo fell short on both frills and function. Builder- grade cabinets and white laminate counters set a cheerless, monotonous tone in an open space that can be seen from the front door. And washing dishes meant looking at a worn wood cabinet, as the window didn’t line up over the sink. Opening the dishwasher blocked the oven door and vice versa. “It was a sad-looking space,” says Eduardo.

Sad-Looking Space


A bland color scheme and an awkward layout made this kitchen boring and inconvenient. So after a year—and with some DIY know-how passed down from his contractor dad—Eduardo spent two weeks removing the oak cabinets, refinishing and reinstalling them, then putting in new counters. The sink and the dishwasher swapped places, improving the room’s flow, and he added sleek new hardware and fixtures to update the space.

Beautiful Backsplash


The new faucet (Delta) is classic and functional, with a graceful shape. The priciest splurge was the colorful mosaic tile (Casa Italia, Green Mix Mosaic Glass from Floor and Decor Outlets of America), but the green-and-white glass-tile backsplash brought in a finishing touch of color. Says Eduardo, “Now, when I walk in and see the kitchen, it makes me smile.”

Homeowner Tip: Eduardo picked up a small wet saw for just $59: “It cut the glass tiles like they were cookies. It was so easy.”

Dynamite Details: Cabinet Pulls


The removed-and-reinstalled cabinets look like completely new boxes, thanks to a DIY paint job. Rectangular bar pulls (IKEA) updated the cabinets and complemented their new modern chocolate-colored finish.

Dynamite Details: Lighting


An inexpensive home-center find, the spotlight fixture (Home Depot) targets its beams on the kitchen’s separate workstations. And, the brushed-nickel finish matches the new cabinet pulls beautifully.

Finding Storage in Small Spaces


Since the kitchen is on the small side, the homeowners added shelves underneath the breakfast bar area to hold the microwave and other appliances when not in use. This smart use of space clears up the countertop for food prep and other everyday use.

Eduardo and Moo are saving for the next phase of the makeover: new appliances. But for now, chocolate-colored paint (Behr) on the cabinets and a countertop swap (IKEA), along with nickel-finish fixtures and cool green mosaic tiles complete the contemporary makeover.

Project Tally


• Removed and reinstalled original cabinets in a slightly new configuration, $0

• Replaced old laminate counters with new ones that have stainless-steel edge banding, $300

• Put a fresh coat of paint on walls and ceiling, $34

• Sanded original oak cabinets and brushed on a gallon of new chocolate-brown paint, $28

• Added a brushed nickel, three-light ceiling fixture, $35

• Swapped in nickel-finished cabinet pulls, $80

• Upgraded the kitchen faucet, $45

• Added undercabinet pucks for task lighting, $45

• Installed new glass tile mosaic backsplash, $400

TOTAL: $967

{Source}


10 Cheap Home Selling Tips

Friday, October 12th, 2012

Easy ways to make your home more attractive to potential buyers

ByYuki Hayashi

Getting ready to sell? Move your property fast – and for the highest selling price possible – with these easy, affordable staging tricks. These deal-sealing changes will make your home attractive to the largest pool of potential buyers, and the best part is, you can start at any stage in the game. Who knows – you may love your home’s new look so much that you decide not to list after all!

1 Paint!

Dollar for dollar, a fresh coat of paint gives you more bang for your decorating buck than anything else. Even if your current palette is relatively new, any scuffs or wear marks will channel an unkempt vibe. And an unusual colour choice – even if the height of fashion – may limit your home’s appeal. So break out that roller and slap on a couple coats of crowd-pleasing warm white or sand paint.

2 Improve the lighting
Replace any dated light fixtures ASAP. How can you tell if it has to go? If it’s over 15 years old and looks it – yet isn’t a vintage (50-75 years old) or antique piece (older) – it should probably go. “Retro” is not something most homebuyers are looking for. You don’t need to break the bank, just head to IKEA or Canadian Tire.

3 De-clutter
Take the collectibles off the mantel, put the mismatched armchair into storage (or better yet, donate it) and pare your closets down to what you’re actually wearing this season, packing away the rest. Ideally, all this extra stuff would head to charity (if in good, saleable condition), the garbage dump, or into storage. The more you store onsite, the more cluttered and small your home appears.
4 Give dated bathrooms a facelift
A nice bath helps sell a house but, don’t invest in a total renovation. Renos are costly, and you won’t recoup your costs unless you find your exact décor doppelganger. Bring an out-of-date bath up to speed with gleaming white walls whether via a fresh coat of white bath and kitchen paint or ceramic tile and new lighting (Home Depot excels at affordable, stylish bathroom vanity lighting). Buy neutral new shower curtains, a simple new bath mat and vanity set, and have fresh flowers in the room during open houses.

5 Take down curtains
Dated window treatments need to come down, pronto (if it’s over 10 years old, get rid of it). If privacy isn’t an issue, just leave the windows bare to maximize natural light and make the room’s dimensions seem more generous. Otherwise, buy basic-issue cotton or linen drapes from Linens ‘N Things or another well-priced retailer. Always tie drapes back during viewings and open houses.

6 Put up mirrors
Make small rooms appear bigger and dark rooms seem brighter by adding an attractive wall mirror. A boxlike dining room will benefit from a leaning floor mirror (Lowes sells well priced ones, and HomeSense often has great deals) and an entranceway more welcoming with a console mirror.

7 Update porch hardware
Increase your home’s curb appeal by updating the hardware on your front porch. Buy a doorknocker or bell, mailbox, kick plate, doorknob and lockset in a set or in complementary styles. Brushed nickel is a neutral finish that will never date, while oil-rubbed bronze is another favourite.

8 And the porch light
Update your porch light to coordinate with the new hardware, if needed. They don’t have to be an exact match or even come from the same period, but the finishes and styles should look pleasing together.

9 Spiff up the front yard
Refresh your front yard according to the season. In spring, summer and fall, trim back dead plants and foliage and plant attractive annuals or perennials in flowerbeds. In winter, keep the walkway shoveled and cut back any tree or shrub branches damaged by heavy snowfall. A pair of planters flanking the front door and filled with seasonal arrangements instantly conveys pride of ownership.

10 Tend the backyard

Simple fix-its will make the most of your existing yard layout. Replace any damaged boards on your deck or fence, and apply a fresh coat of paint, or stain and sealant if the finish needs it. Weed and groom your garden and add some perennials for colour when in-season. If kids’ toys are taking over the space, put some in storage. Think “tidy,” “update” and “refresh”: never do anything costly or major like adding a swimming pool or pond, which may put off potential buyers.

{Source}


Backyard Weddings

Monday, May 28th, 2012

More and more often, couples are turning to backyard weddings as a romantic and intimate way to tie the knot, but it’s the type of in-house celebration that takes some foresight. When it comes to budget, the cost of a backyard wedding can be a shocker. The total tally can be as much or more than the average wedding, which nowadays hovers around $25,000+. Whatever your budget, the idea is to host a soiree you and your guests will enjoy. So before you exchange those vows near your childhood swing set, read the following tips.


Home Improvement

The first thing to consider is whether your home is suited for the wedding, says wedding planner Donna Stasko of R.S.V.P. Party Planners, based in Mississauga, Ontario. That means you must determine early on how many people you’ll invite, as well as suss out the layout of your home and garden. Is your backyard level or is sloping? Is your backyard big enough to comfortably seat your guests for dinner, or will you have to adjust your plans to a cocktail affair? “You’ve got to know your numbers. That will dictate what we can and cannot do,” says Stasko.


Cost Conscious

It’s the golden rule: “Anything can be done if you want to pay the money,” says Stasko. Decide what fits best within your budget, and in your home. Will it be a full dinner or finger foods affair? A casual or a fancy barbeque? Luncheons or afternoon tea parties are popular too, and will certainly bring the price down. You’ll save on liquor and venue prices, but if you envision an elegant, fairy tale wedding it could be very pricey. “It can turn out to be just as much as a banquet facility,” says Stasko. Tents are a must for any outdoor affair, she adds. If you have to cut costs, keep the tent, and cut elsewhere.


Parking Problems

Don’t make your guests walk miles to get to the ceremony. Consider parking issues. Depending on the number of guests, scout your neighbourhood to determine whether there are enough parking spots outside, or near the house. “It depends on the area,” says Stasko. “If it’s normal residential then people can park on the street. We can set up a valet service.” If parking becomes an issue talk to your neighbours and find out if you can negotiate using their spots. The same applies for noise, says Stasko. Advise neighbours of your party plans.


Floral Fun

Depending on when you plan to have your backyard wedding, consider what flowers will be blooming in your garden at the time, if any. Flowers are always a beautiful way to embellish the day of, but with a garden at your disposal the possibilities are endless. “I’ve done it a lot of different ways,” Stasko says of co-ordinating floral arrangements. “A lot of people have baskets on each table with different and brilliant colours.” Not everyone wants the décor to be rustic, though. You might consider simple glass vases with classic flowers such as roses and lilacs. “We can colour scheme anything to the garden,” says Stasko.


Let Caterers Cater to You

Depending on the type of party you’re hosting, plan your menu well in advance. Not just what your guests will be eating, but exactly how the food will be cooked, delivered and stored. If you choose to have a caterer, make sure it’s a reputable one. “A good caterer should always do the rentals because they know what they need,” says Stasko. “And they have their own staff!”


Sinking Heels?

Backyard carpets are available but most couples don’t rent them, says Stasko. “They say guests know it’s an outside wedding, so they won’t wear stiletto heels,” she says. However, a lot of couples go for the dance floors, which are easily accessible. It might be a good idea to remind the style mavens on your wedding guest list that it’s a backyard party! But if it’s really swanky then seriously consider renting carpets.

Control4 Home Automation System Demo of Smart Home Technology

Sunday, May 27th, 2012

It’s technology that links and controls the electronics and systems in your home – through one easy-to-use interface. At Digital Smart Homes, we believe that life’s better when everything works together. Smart Homes start with a few basic categories: One Touch Home Theatre, Multi-room Music & Video, Smart Lighting & Shades, Advanced Temperature Control, Safety and Security.


Control4 offers a complete line of home-automation products that makes sophisticated home-control solutions practical and affordable for every home. With Control4, everything works better because it works together – home theater, multi-room music, lighting, temperature, safety and security systems – are all controlled by a single platform.

We can install full-featured, practical, and reliable home-automation systems that are easy to use and at a price that fits into your budget. Our scalable designs also mean that it’s not an all-or-nothing choice—you can start with a basic system and upgrade over time with solutions that fit your evolving lifestyle.

Imagine Having a Single Remote That Will:
  • Control your home theater
  • Dim the lights as the opening credits roll
  • Turn off all your TVs when your kids should be doing homework
  • Alert you that the garage door is open…and then close it
  • Manage your lights, window coverings, and thermostats
  • Monitor your locks, lighting, and security cameras
  • Allow you to play music in any room of the house
HOME THEATER
Control4 simplifies the control of audio, video, and home-theater components, eliminating the need for multiple remotes.
SMART LIGHTING
Control lighting using timers, motion sensors, and dimmers to create interior ambiance, enhance security, and reduce energy costs.
MULTI-ROOM MUSIC
Enjoy digital music collections – like XM or Sirius, Rhapsody or your personal iPod library – from anywhere in your home.
ADVANCED CLIMATE CONTROL
With Control4, help conserve energy and ensure comfort with pre-programmed temperature controls.
Do more with Control4…
Integrate a wide range of products including door locks, window shades, pool controllers, appliance monitors and much more. If you can imagine a way that home-control would make your life easier, we can probably make it happen!

Bored with your Headboard? Awaken Your Imagination

Saturday, May 26th, 2012

Bored with your  Headboard? Awaken Your Imagination   

The  bed is the centerpiece of almost every bedroom.  It takes up the most  room, it’s where your eye is naturally drawn to, and it’s the place where you  spend a third of your day.  Yet despite all the attention on beds,  headboards are often humdrum, predictable pieces of furniture.  So why not  add some style and personality to your headboard?  All you need is a  little imagination.  Here are a few ideas  to get you thinking:

Fabulous  Fabric
Fabric is a great way to add intrigue to the focal point of your  bedroom.  Instead of a standard headboard, consider hanging a family quilt  on a curtain rod for a quaint, farmhouse effect. Even a striking curtain can  extend the eye upwards and bring your bedroom style to new heights.  Or add  some panache with a few decorative hooks.

Right Frame of Mind
A  framed piece of appealing art can add vertical interest above any bed.   Consider a series of framed photographs to help personalize your bedroom,  and emphasize them with subtle wall lighting.  Go for glamour with a  framed antique mirror that can also help create the impression of extra space.

Shabby Chic
If  you’re going for a look that mixes urban trend with a traditional tone, think  shabby chic. Old doors, window shutters, mantle pieces, and uneven planks of  wood can all be repurposed into vintage-looking headboards.  Either  refinish wood with its natural colour or use light blues, browns, or whites to  create a dreamy combination of rustic and elegance.

Artsy, Optical Illusion
Want  to really think outside the box-spring? Why not create a new headboard right on  the wall?  Great for kids rooms, guest rooms, or just to save space,  simply paint a faux headboard on the wall in a colour that stands out.   Get even more creative with chalk paint and draw yourself a new headboard  whenever you wish!

With  the right mix of imaginative colour, design, and style, you’ll have the bedroom  of your dreams!


© Copyright 2017, Real Estate Websites by Redman Technologies Inc. | Privacy Policy | Disclaimer | Sitemap

MLS®, REALTOR®, and the associated logos are trademarks of The Canadian Real Estate Association.

The data included on this website is deemed to be reliable, but is not guaranteed to be accurate by the Kitchener-Waterloo Real Estate Board. The trademarks REALTOR®, REALTORS® and the REALTOR® logo are controlled by The Canadian Real Estate Association (CREA) and identify real estate professionals who are members of CREA. Used under license.